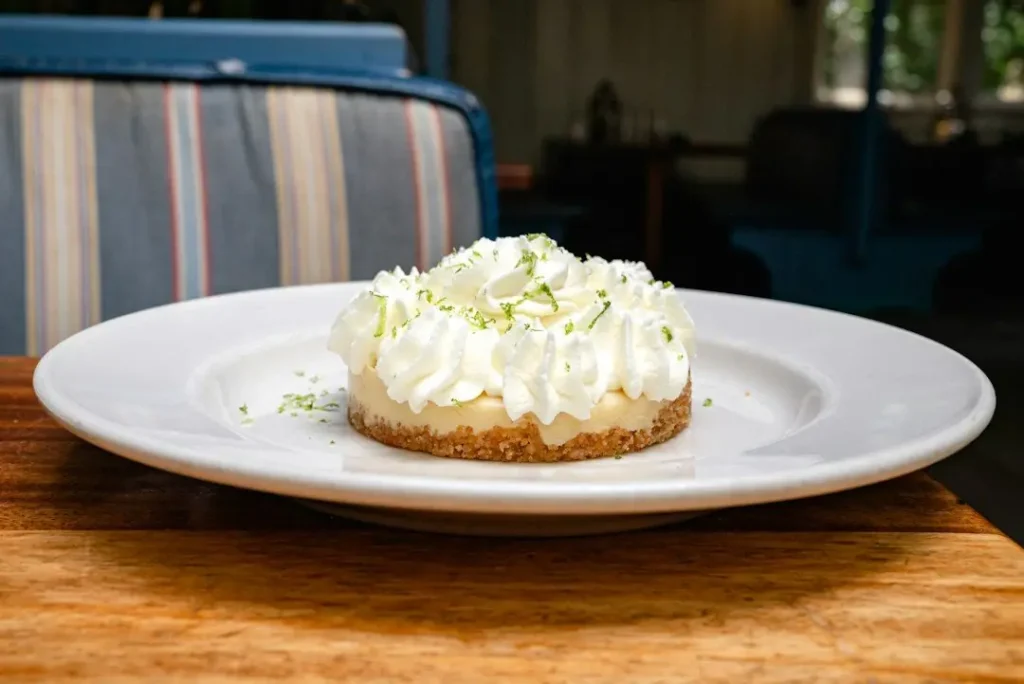
The Dessert That Stops Every Conversation at the Table
The first time I made Key Lime Pie Bars, it was the middle of July and my kitchen felt like a sauna. I didn’t want to fuss with a fussy pie crust, I didn’t want to babysit a water bath, and I absolutely did not want to turn on my oven for longer than necessary. But I had a bag of graham crackers, a pile of key limes that I’d optimistically bought at the farmer’s market, and a can of sweetened condensed milk staring at me from the pantry shelf. So I made bars instead of a full pie — and honestly? I’ve never looked back.

- 2 cups graham cracker crumbs (about 14–15 full sheets, finely crushed)
- 3 tablespoons granulated sugar
- 1/2 teaspoon fine sea salt
- 6 tablespoons unsalted butter, melted
- 4 large egg yolks
- 2 teaspoons fresh lime zest
- Two 14-oz cans sweetened condensed milk
- 3/4 cup fresh key lime juice (or regular lime juice, or bottled Nellie & Joe’s Key Lime Juice)
- Whipped cream, for serving (optional)
- Powdered sugar, for dusting (optional)
- Thin lime slices or zest curls, for garnish (optional)
- Flaky sea salt, for topping (optional)
- Preheat your oven to 350°F. Line a 9×13-inch baking pan with parchment paper, leaving an overhang on the long sides so you can lift the bars out cleanly. Lightly grease the parchment with nonstick spray or a swipe of butter.
- Make the crust: In a large bowl, stir together the graham cracker crumbs, granulated sugar, and salt until combined. Pour in the melted butter and mix until the crumbs resemble wet sand and hold together when pressed between your fingers. Add another teaspoon of melted butter if the mixture feels too dry.
- Press the crust into the prepared pan in an even, firm layer across the bottom using the flat bottom of a measuring cup or glass to pack it down firmly. Keep the crust flat on the bottom — do not press it up the sides.
- Pre-bake the crust for 8–10 minutes, until just set and lightly toasty smelling. Remove from the oven and let cool for 5 minutes while you prepare the filling.
- Make the filling: In a large mixing bowl, whisk the egg yolks and lime zest together vigorously for about 2 minutes until pale and slightly thickened. Add both cans of sweetened condensed milk and whisk until fully combined and smooth. Add the key lime juice and whisk gently until fully incorporated. The filling will look thin — this is normal.
- Pour the filling evenly over the pre-baked crust, using a spatula to nudge it into the corners if needed.
- Bake at 350°F for 18–22 minutes, until the edges look set and the center has a very slight jiggle. Do not overbake — you want the bars creamy, not rubbery.
- Remove from the oven and let cool at room temperature for at least 30 minutes. Then transfer the pan to the refrigerator and chill for a minimum of 3 hours, or overnight for best results.
- Lift the bars out of the pan using the parchment overhang and place on a cutting board. Slice into squares or rectangles with a sharp knife, wiping the blade clean between cuts for the neatest edges.
- Top with whipped cream, a dusting of powdered sugar, lime zest curls, or a pinch of flaky sea salt if desired. Serve cold.
What came out of that oven was something magical. A golden, buttery graham cracker crust with just enough crunch to hold everything together, topped with a filling so creamy and tangy and perfectly sweet that my husband ate three squares before I’d even dusted them with powdered sugar. That tart, citrusy perfume that fills your kitchen while they bake is something I genuinely look forward to every summer. It smells like a Florida beach vacation and a dessert table at a backyard party all at once. These bars are everything a good key lime dessert should be — bright, bold, smooth, and completely addictive.
What I love most about making Key Lime Pie Bars versus a traditional pie is how forgiving and portable they are. You don’t need a pie dish. You don’t need a fancy fluted edge or a perfectly crimped crust. You press the graham cracker base into a 9×13 pan, pour the silky filling over it, bake for just 20 minutes, and chill. That’s it. They slice cleanly, stack beautifully, and hold up perfectly on a dessert platter or tucked into a picnic basket. If you’ve ever been intimidated by making a proper key lime pie from scratch, this recipe is your answer. It’s just as impressive and about a hundred times more relaxed.
Why You’ll Love These Key Lime Pie Bars
- Simple pantry ingredients: Sweetened condensed milk, egg yolks, fresh lime juice, graham crackers, butter — that’s basically the whole recipe. Nothing exotic, nothing hard to find.
- Perfectly balanced flavor: The filling is tangy without being puckery, sweet without being cloying. It’s that exact ratio that makes you reach for a second bar before you’ve finished your first.
- Make-ahead friendly: These bars actually get better after a night in the fridge, which makes them ideal for parties, potlucks, and holiday spreads. Make them the day before and you’re done.
- No water bath, no fussy technique: Unlike cheesecake bars or traditional custard pies, there’s no elaborate baking method here. Mix, pour, bake, chill. That’s the whole workflow.
- Crowd-pleaser every single time: I’ve brought these to cookouts, baby showers, family dinners, and office potlucks. Every single time, someone asks for the recipe before the pan is even empty.
What You’ll Need
Let’s talk ingredients, because a few of them really matter here and are worth a little extra attention before you start.
For the Graham Cracker Crust
- 2 cups graham cracker crumbs (about 14–15 full sheets, finely crushed) — You want them fine and even, almost like coarse sand. A food processor does this in 30 seconds, or you can crush them in a zip-lock bag with a rolling pin.
- 3 tablespoons granulated sugar — Just enough to lightly sweeten the crust without making it candy-like.
- ½ teaspoon fine sea salt — Don’t skip the salt in a sweet crust. It makes everything taste more balanced.
- 6 tablespoons unsalted butter, melted — Use real butter. The crust needs the fat to bind and the flavor to shine. Salted butter works too — just omit the added salt.
For the Key Lime Filling
- 4 large egg yolks — Yolks only give the filling its rich, golden color and silky texture. Save the whites for an omelet or meringue.
- 2 teaspoons lime zest — Zest before you juice! This is where so much of the aromatic, floral citrus flavor lives. Don’t skip it.
- Two 14-oz cans sweetened condensed milk — This is the backbone of the filling. Do not substitute evaporated milk — they are not the same thing.
- ¾ cup fresh key lime juice — Fresh is best, always. If you can find real key limes (they’re smaller, rounder, and more floral than Persian limes), use them. If not, regular lime juice works beautifully and most people genuinely cannot tell the difference in bars. Bottled Nellie & Joe’s Key Lime Juice is a solid shortcut if fresh limes aren’t available.
Optional Toppings
- Freshly whipped cream or store-bought whipped topping
- Powdered sugar for dusting
- Thin lime slices or zest curls for garnish
- A pinch of flaky sea salt on top (trust me on this one)
You might also love the way these bars pair with a cool, creamy topping — if you enjoy no-bake citrus desserts, you’d probably also adore my no-bake lemon cheesecake bars, which use a similar technique with a raspberry swirl on top.

How to Make Key Lime Pie Bars
This recipe comes together in about 35 minutes of active time, plus chilling time. Plan ahead — these bars need at least 3 hours in the fridge to fully set, and overnight is even better. Don’t rush the chill. It’s the step that transforms good bars into great bars.
- Preheat your oven to 350°F. Line a 9×13-inch baking pan with parchment paper, leaving an overhang on the long sides so you can lift the bars out cleanly later. Lightly grease the parchment with nonstick spray or a swipe of butter.
- Make the crust. In a medium bowl, stir together the graham cracker crumbs, granulated sugar, and salt until combined. Pour in the melted butter and mix until the crumbs look like wet sand and hold together when you press a small handful between your fingers. If it still feels too dry, add another teaspoon of melted butter.
- Press the crust into the pan. Tip the crumb mixture into your prepared pan and press it into an even, firm layer across the bottom. Use the flat bottom of a measuring cup or a glass to really pack it down — this is the key to a crust that holds its shape when you slice the bars. Don’t press it up the sides; just keep it flat on the bottom.
- Pre-bake the crust. Slide the pan into the preheated oven and bake for 8–10 minutes, until the crust is just set and smells toasty. It won’t look dramatically different, but this step is essential — it keeps the crust from getting soggy under the filling. Pull it out and let it cool for 5 minutes while you make the filling. Don’t skip this step — it’s the secret to a crust that actually crunches when you bite in.
- Make the filling. In a large mixing bowl, whisk the egg yolks and lime zest together vigorously for about 2 minutes. The mixture will turn pale and slightly thick — that’s what you want. Add both cans of sweetened condensed milk and whisk until fully combined and smooth. Finally, add the fresh key lime juice and whisk gently until everything is incorporated. The filling will look thin at this point. That’s perfectly normal — it sets in the oven.
- Pour and bake. Pour the filling evenly over the pre-baked crust. It will spread easily on its own — you can use a spatula to nudge it into the corners if needed. Bake at 350°F for 18–22 minutes. The filling is done when the edges look set and the center still has a very slight jiggle, like a barely-set gelatin. It will continue to firm up as it cools. Do not overbake — you want creamy, not rubbery.
- Cool completely, then chill. Let the bars cool at room temperature for at least 30 minutes, then transfer the pan to the refrigerator. Chill for a minimum of 3 hours — overnight is ideal. This patience is rewarded with bars that slice perfectly cleanly with a sharp knife.
- Slice and serve. Lift the bars out of the pan using the parchment overhang. Place on a cutting board and use a sharp knife to slice into squares or rectangles, wiping the blade clean between cuts for the neatest edges. Top with a dollop of whipped cream, a dusting of powdered sugar, or a curl of lime zest. Serve cold.
Tips, Variations, and Storing Your Key Lime Pie Bars
Tips for Perfect Bars Every Time
- Zest before you juice. This sounds obvious until you forget and try to zest an already-halved lime. Always zest first, juice second.
- Room temperature yolks whisk more easily. If you have a few minutes, let your eggs sit on the counter while the crust bakes. They’ll incorporate more smoothly into the condensed milk.
- Use a sharp, thin knife to slice. Wipe it with a damp towel between each cut. This is what gives you those clean, restaurant-style edges you see in food photography.
- Don’t overbake. I can’t stress this enough. Pull the bars when the center still has a slight wobble. They’ll firm up beautifully in the fridge.
- Taste your lime juice. Key limes can vary in tartness. If your juice is extremely sour, you can reduce it to ½ cup. If you love a super tangy bar, go up to a full cup.
Fun Variations to Try
- Coconut crust: Swap ½ cup of the graham cracker crumbs for sweetened shredded coconut. Toast it lightly in a dry pan first for extra depth. It’s a tropical dream.
- Raspberry key lime bars: Drop a few spoonfuls of raspberry jam onto the filling before baking and swirl with a toothpick. The tartness of the raspberries and the lime are absolute best friends.
- Frozen key lime pie bars: After chilling in the fridge, move the pan to the freezer for 2 hours. Slice and serve frozen for a bar that eats like an ice cream treat. Perfect on hot summer days.
- Mini bars: Use a 9×9 pan and cut into smaller squares for a bite-sized version — great for party trays or dessert charcuterie boards.
- Lemon bars twist: Swap the lime juice and zest for lemon and you’ve got a cousin dessert that’s equally wonderful. If you love citrus desserts like these, my classic lemon bars with shortbread crust is another reader favorite that uses a buttery base with a bright, custardy top.
Storage
Store your Key Lime Pie Bars covered in the refrigerator for up to 5 days. They actually taste even better on day two, so don’t be shy about making them ahead. For longer storage, freeze the bars (without whipped cream topping) in a single layer on a parchment-lined sheet, then transfer to a freezer bag once solid. They’ll keep for up to 2 months in the freezer — thaw overnight in the fridge before serving.
If you’re planning a full summer dessert spread, these bars pair wonderfully alongside my strawberry icebox cake — the creamy, cool contrast is absolutely perfect for an outdoor gathering. And if you need a showstopper that requires zero baking beyond the crust, check out my no-bake cheesecake with fresh berries for another crowd-favorite bar-style dessert that lives in the same easy-breezy category as these key lime beauties.
Frequently Asked Questions About Key Lime Pie Bars
Can I use bottled lime juice instead of fresh?
You can, and it’ll still be good — but fresh really does make a noticeable difference in brightness and aroma. If fresh key limes aren’t available, look for Nellie & Joe’s Famous Key Lime Juice in the juice aisle or online. It’s made from actual key limes and is a great substitute. Regular bottled lime juice will work in a pinch, though the flavor is a bit more one-dimensional.
Why are my key lime pie bars too soft or runny after chilling?
This is almost always a sign that the bars were either underbaked or not chilled long enough. Make sure the filling bakes until the edges look set even if the center still has a tiny jiggle — that’s correct. Then give them a full 3 hours in the fridge, or ideally overnight. If after all that they’re still soft, your oven may run cool, so add another 3–5 minutes of bake time next round.
Can I make these key lime pie bars ahead of time?
Absolutely — in fact, I recommend it. These bars taste even better after resting overnight in the fridge because the flavors have time to meld and the filling fully sets to a sliceable, creamy consistency. Make them up to 2 days in advance and keep them covered in the refrigerator. Add any whipped cream or toppings right before serving so they stay fresh.
What’s the difference between key limes and regular limes?
Key limes (also called Mexican or West Indian limes) are smaller, rounder, and have a more floral, slightly more tart and aromatic flavor compared to the larger Persian limes you usually find at the grocery store. The flavor difference is subtle but real — key limes have a slightly more complex, almost tropical quality. That said, Persian lime juice works beautifully in this recipe and most people can’t tell the difference in the final bars.
Can I double this recipe?
Yes! This recipe doubles really well. Use two 9×13 pans or one large half-sheet pan. Keep the bake time the same — just check for that slight center jiggle at the 20-minute mark and go from there. This is a great move when you’re feeding a crowd or bringing dessert to a big event. The bars also freeze well if you end up with extras.
Go Make These — You’ll Be So Glad You Did
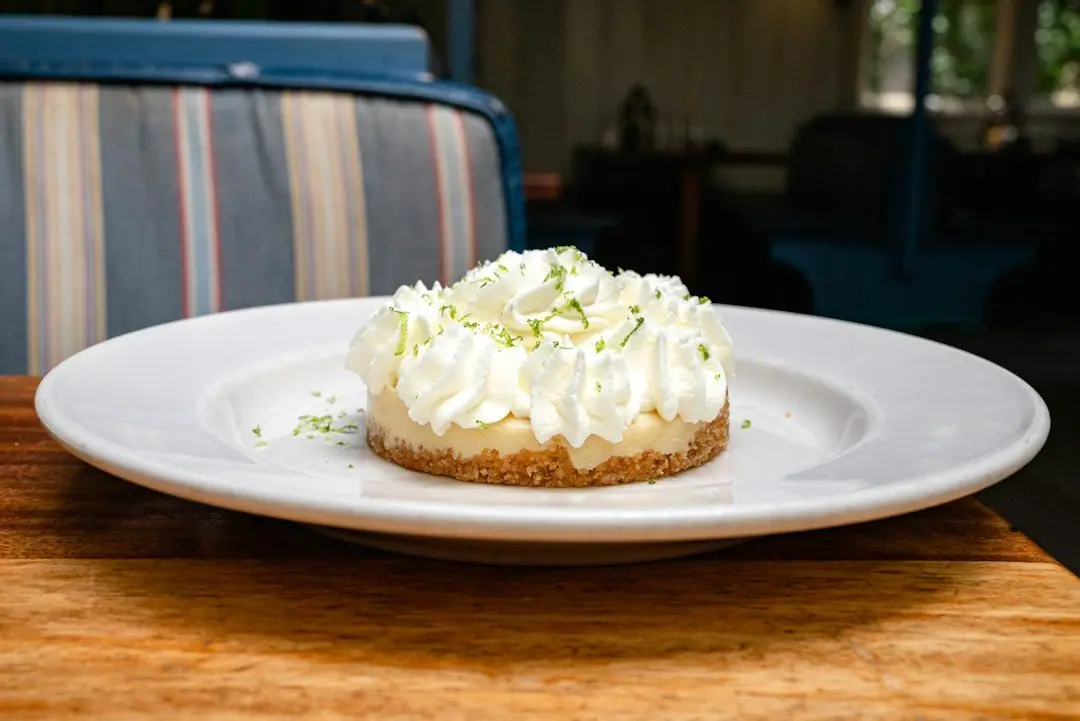
There’s something about a pan of Key Lime Pie Bars that just makes people happy. Maybe it’s that vibrant, sunshine-yellow color against the golden crust. Maybe it’s the way the first bite hits you — tangy, then sweet, then that buttery graham cracker crunch. Whatever it is, this recipe has become one of those things I make on autopilot every summer, and I genuinely never get tired of it. It’s the kind of dessert that feels special even though it takes almost no effort, and that’s my absolute favorite kind of baking.
If you make these Key Lime Pie Bars, I want to hear about it! Leave a comment below and tell me how they turned out, if you tried any of the variations, or if you snuck one straight from the pan before they were fully chilled (no judgment — I do it every time). And if you’re saving this recipe to make later, pin it now so you always know where to find it. Happy baking, friend. I’ll save you a square.


