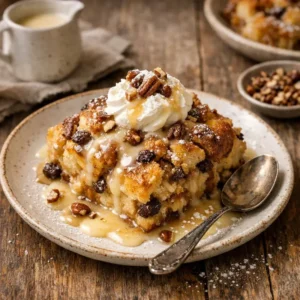
Stained Glass Cookies are not just a treat; they’re a delightful explosion of color and flavor that can brighten any occasion. Imagine biting into a buttery, sweet cookie that has a kaleidoscope of vibrant, translucent candy nestled right in the center, like a beautiful stained glass window capturing the light. The aroma wafts through your kitchen, luring everyone in with promises of sweetness and creativity.
These cookies have a special place in my heart, reminding me of family gatherings where we gather around the table, laughter echoing as we decorate each cookie to our heart’s content. Whether you whip them up for holidays or just because you want to impress your friends (or distract them from your questionable cooking skills), Stained Glass Cookies are sure to be a hit. Get ready for an amazing flavor experience that’ll make you feel like a cookie Picasso!
Why You'll Love This Stained Glass Cookies
- These Stained Glass Cookies offer more than just flavor; they make meal prep a breeze.
- You can easily customize the ingredients based on what you have on hand.
- The vibrant colors and aromas make it visually stunning on any dinner table.
- Perfect for any occasion but versatile enough for everyday enjoyment.
Ingredients for Stained Glass Cookies
Here’s what you’ll need to make this delicious Stained Glass Cookies:
-
All-Purpose Flour: Essential for structure, this flour provides the backbone of your cookie dough.
-
Granulated Sugar: This adds sweetness and contributes to that lovely chewy texture we all crave.
-
Butter: Unsalted butter is best; it gives richness while allowing you to control salt levels.
-
Egg: One large egg binds everything together and adds moisture for the perfect crumb.
-
Vanilla Extract: A splash of vanilla enhances the overall flavor profile and makes everything taste better.
-
Candy (Jolly Ranchers or similar): These will melt beautifully in the center, creating the stained glass effect!
The full ingredients list, including measurements, is provided in the recipe card directly below.

How to Make Stained Glass Cookies
Follow these simple steps to prepare this delicious Stained Glass Cookies:
Step 1: Preheat Your Oven
Preheat your oven to 350°F (175°C). Trust me; your future cookies will thank you for this crucial step.
Step 2: Prepare Your Baking Sheet
Line two baking sheets with parchment paper. This will prevent any sticky situations later on when you’re trying to retrieve those precious cookies.
Step 3: Mix Your Ingredients
In a large bowl, cream together softened butter and granulated sugar until light and fluffy. Add the egg and vanilla extract, mixing until well combined.
Step 4: Combine Dry Ingredients
In another bowl, whisk together all-purpose flour and a pinch of salt. Gradually add this mixture to your wet ingredients until fully incorporated—no one wants floury clumps ruining their masterpiece!
Step 5: Shape Your Cookies
Scoop tablespoon-sized balls of dough onto your prepared baking sheets, leaving enough space between each cookie because they will expand!
Step 6: Make Your Stained Glass Centers
Now comes the fun part! Crush your candy into small pieces (you can use a zip-top bag and hammer if you’re feeling aggressive) and place a little pile in the center of each cookie dough ball.
Transfer to your preheated oven and bake for about 10-12 minutes or until the edges are lightly golden brown. The candy should be melted but not bubbling over—nobody wants sticky floors!
Let them cool completely before marveling at your colorful creations. Transfer them gently onto plates, showcasing their vibrant stained glass centers like trophies after an epic bake-off!
Enjoy these whimsical treats at family gatherings or as a surprise dessert for friends—it’s hard not to smile when seeing those colorful cookies!
You Must Know About Stained Glass Cookies
- This amazing Stained Glass Cookies offers more than just flavor; it makes meal prep a breeze.
- You can easily customize the ingredients based on what you have on hand.
- The vibrant colors and aromas make it visually stunning on any dinner table.
- Perfect for grilling but versatile enough for baking or pan-searing.
Perfecting Stained Glass Cookies Cooking Process
Begin by preheating your oven to 350°F (175°C). Roll out the cookie dough and cut out shapes. Next, fill the centers with crushed hard candies before baking until golden. This sequence ensures even cooking and perfect candy melting.
Add Your Touch to Stained Glass Cookies
Get creative with your stained glass cookies! Swap out the hard candies for chocolate chips or dried fruits, or add spices like cinnamon or nutmeg for extra warmth. The possibilities are endless!
Storing & Reheating Stained Glass Cookies
Store your stained glass cookies in an airtight container at room temperature for up to a week. If you need to reheat, pop them in a low oven for a few minutes to bring back their delightful texture.
Chef's Helpful Tips for Stained Glass Cookies
- These tips will elevate your stained glass cookies from good to spectacular!
- Remember, the secret lies in preparation and attention to detail, ensuring that every bite is as beautiful as it is delicious.
– Use fresh hard candies for the best color and flavor impact; stale candies may not melt properly.
– Roll the dough between two sheets of parchment paper to avoid sticking and ensure uniform thickness.
– Let cookies cool completely before removing them from the baking sheet; this helps maintain their shape.
I remember making these cookies during a family gathering, and everyone flipped over them! They were not just delicious but also brought such joy with their colorful designs. It’s moments like these that make baking so special.
FAQs About Stained Glass Cookies
What are Stained Glass Cookies?
Stained Glass Cookies are delightful treats that combine a classic sugar cookie base with colorful candy pieces to create a stunning visual effect. When baked, the hard candies melt and form beautiful, transparent centers resembling stained glass windows. These cookies are not only visually appealing but also deliciously sweet. They make perfect gifts or festive treats for holidays and special occasions, adding a touch of creativity to your baking repertoire.
How do you make Stained Glass Cookies?
To create Stained Glass Cookies, start by preparing a simple sugar cookie dough using ingredients like flour, butter, sugar, and eggs. Roll out the dough and cut it into shapes using cookie cutters. Next, cut out smaller shapes from the center of each cookie and fill these cavities with crushed hard candies. Bake until the edges are golden brown and the candies have melted to form beautiful glass-like centers. Let them cool before enjoying these vibrant treats!
Can I customize my Stained Glass Cookies?
Absolutely! You can customize your Stained Glass Cookies by using different cookie shapes or colors of hard candies. For instance, use holiday-themed cutters for Christmas or Halloween designs. Additionally, try mixing flavors by incorporating extracts like vanilla or almond into the dough for added depth. The color combinations of hard candies can also vary based on your preferences or seasonal themes.
How should I store Stained Glass Cookies?
To keep your Stained Glass Cookies fresh, store them in an airtight container at room temperature. This will help maintain their crisp texture and prevent them from becoming too soft. If you want to keep them longer, consider freezing them in a single layer before transferring them to a freezer-safe container. Thaw at room temperature before serving to enjoy their delightful taste anytime.
Conclusion for Stained Glass Cookies
In summary, Stained Glass Cookies are a beautiful and tasty addition to any dessert table. With their colorful candy centers and sweet flavor, they can be easily customized for various occasions. Whether you’re baking for the holidays or just for fun, these cookies will surely impress friends and family alike. Remember to follow the steps carefully for the best results and enjoy creating these delicious Stained Glass Cookies!

Stained Glass Cookies
- Total Time: 27 minutes
- Yield: About 24 cookies 1x
Description
Stained Glass Cookies are a whimsical treat that combines a classic sugar cookie base with colorful melted candies, creating a stunning stained glass effect. These vibrant cookies are perfect for festive occasions or family gatherings, offering a sweet, buttery flavor that delights both kids and adults alike. Enjoy the fun of decorating while making memories in the kitchen!
Ingredients
- 2 3/4 cups all-purpose flour
- 1 cup granulated sugar
- 1 cup unsalted butter, softened
- 1 large egg
- 2 tsp vanilla extract
- 1 cup crushed hard candy (such as Jolly Ranchers)
Instructions
- Preheat your oven to 350°F (175°C) and line two baking sheets with parchment paper.
- In a large bowl, cream together the softened butter and sugar until light and fluffy. Add the egg and vanilla extract, mixing well.
- In another bowl, whisk together the flour and a pinch of salt. Gradually add this mixture to the wet ingredients until fully combined.
- Scoop tablespoon-sized balls of dough onto the prepared baking sheets, leaving space between each cookie.
- Crush hard candy into small pieces and place them in the center of each cookie dough ball.
- Bake for 10-12 minutes or until edges are lightly golden brown and the candy is melted but not bubbling over. Let cool before serving.
- Prep Time: 15 minutes
- Cook Time: 12 minutes
- Category: Dessert
- Method: Baking
- Cuisine: American
Nutrition
- Serving Size: 1 cookie (28g)
- Calories: 120
- Sugar: 10g
- Sodium: 50mg
- Fat: 7g
- Saturated Fat: 4g
- Unsaturated Fat: 2g
- Trans Fat: 0g
- Carbohydrates: 13g
- Fiber: 0g
- Protein: 1g
- Cholesterol: 20mg